
Homemade steam facial treatment is a popular natural method for cleansing the pores and blackheads. The steam softens the skin, opens the pores and helps cleaning the accumulated dirt. This warm and relaxing treatment can control acne and blackheads breakout, but it also can increase the blood circulation to give you a warm, healthy and youthful glow.
Who can do homemade steam facial and how often?
You can do the steam facial treatment in cosmetic salons and you can also do it at home. The homemade steam facial treatment is suitable for all skin types, but it should not be overused. Steam facial is recommended to be done once a week, people with oily skin can do it twice a week, but no more than that. If you have sensitive skin, it is better to do steam facial every two weeks. Steam facial is absolutely necessary to be avoided by people who have asthma or allergies to plants, people who have extremely sensitive skin and skin problems and people who have major acne problems.

Homemade steam facial treatment in 9 steps
In a half hour you can take care of your skin and make your own mini home spa treatment. The following steps will show you how to get a clean and healthy skin with irresistible glow by doing face steaming at home:
1. Thoroughly clean your face
Before doing face steaming at home, you need to clean your face with a gentle cleanser, but don’t use a face scrub. Wash your face with warm water to ensure that no fat or impurities are left on the skin.
2. Boil some water
Boil at least two cups (1/2 liter) of water. For the actual steam facial treatment, you can use the pot or you can pour the water in a wide bowl. The steam facial can be done only with water, but for maximum effect and enjoyment, you can use herbs and essential oils. If you choose not to use herbs and essential oils, go to step 4.
3. Select herbs or essential oils
Certain herbs and oils can further increase the benefits of the steam facial treatment, depending on the type of your skin. For oily skin you can use these herbs and oils: lavender, green tea, eucalyptus oil or tea tree oil, thin slices of lemon, chamomile and mint. For dry skin you can use lavender, chamomile, rose oil and green tea. If you have sensitive skin you can use chamomile and lavender, and if you have combination of oily and normal skin you can use lavender, green tea and tea tree oil. Once you select the items that will ‘spice up’ the water, put the ingredients in the bowl with the hot water and let them steep for 1-2 minutes.
4. Take a towel and get ready for steam facial treatment
Wait the water to cool down slightly. The steam shouldn’t be too hot to avoid skin irritation. Moreover, the hot steam can cause the appearance of small broken capillaries. If you have long hair, tie your hair back in a bun so it will not touch the water. If you have bangs, clip them away from your face. Take a towel which will trap the steam on your face.
5. Steam your face for 10-20 minutes
Lean over the water, but not too close. Cover your head with a towel so the steam won’t escape. If you have sensitive skin, it is enough to steam your face for 10 minutes. If you have oily skin, you can steam your face for 20 minutes. Your face should be at least 10 inches away from the water. Close your eyes because it is possible that some of the ingredients that you’ve put in the water can irritate your eyes. Breathe deeply and relax. If you feel uncomfortable from the heat, take a few small breaks from time to time, just lift the towel and breathe in cold air.
6. Wipe your face with a towel.
Gently pat your face with a towel without rubbing the skin.
7. Put on a face mask.
After doing a homemade steam facial your face will be warmed and very clean so it’s a great time to use a homemade face mask. After the steam exposure, the pores are open and your skin will easily soak up the nutrients from the mask. You don’t have to put on some complicated masks. You can whip up a simple nourishing homemade mask.
8. Wash your face with lukewarm water.
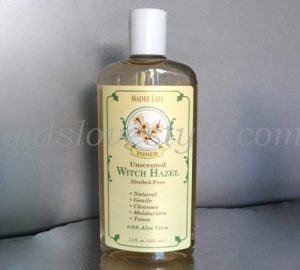
The warm steam opens your pores, but after the homemade steam facial treatment it is necessary to close the pores. You can do that with lukewarm or cold water while you rinse your homemade face mask.
9. Apply moisturizer.
To have soft and smooth skin and to complete your homemade steam facial spa treatment, apply some moisturizer on your face.
By following these steps you can see that making a relaxing and enjoyable homemade steam facial is simple and easy. Have a relaxing mini home spa experience at home.

Good site … i like it
Hey there, You’ve done an excellent job. I will certainly share this post and personally recommend it to my friends.
I am confident they will benefit from this site.
Appreciate the recommendation. Will try it out.
Great post!! Just did this with rosemary and fennel and my skin feels so healthy and glowy! Definitely working this into my beauty routine 🙂
it feels great,And i thinl it also work out for ky skin
If making your own natural spa facial treatments, don’t use any ingredient that you are allergic to!
Very interesting information
Great article, exactly what I was looking for.